Understanding cave light and exposure before you enter
Cave photography begins long before you raise the camera to your eye. When you plan to start photographing caves, think about how every light source will shape the scene and how your exposure choices will either reveal or bury detail in deep shadows. A dark cave punishes guesswork, so a careful photographer prepares settings in advance for the first test photo.
Most caves require you to work with almost no ambient light, which means your cave camera settings must prioritise clean exposure over convenience. Set your camera to shoot RAW, because a RAW image from a cave interior holds far more data for correcting white balance, lifting shadows, and controlling noise than a compressed JPEG photo. Shooting RAW also gives you more flexibility to refine depth of field and sense of depth later, especially when the subject cave includes complex rock formations and textured cave walls.
Before the tour starts, check whether the cave photography rules allow tripods, flash, or continuous lights, because photographing caves on a guided tour often involves strict safety limits. Ask how many people will be in the group, since moving people in a small cave can introduce blur and stray light streaks into a long exposure. If the guide dims the lights during part of the tour, you will need to adapt quickly with a slower shutter speed, a narrower aperture, or higher ISO to keep the cave scene bright enough without losing detail in the cave interior.

Essential gear for photographing caves with control
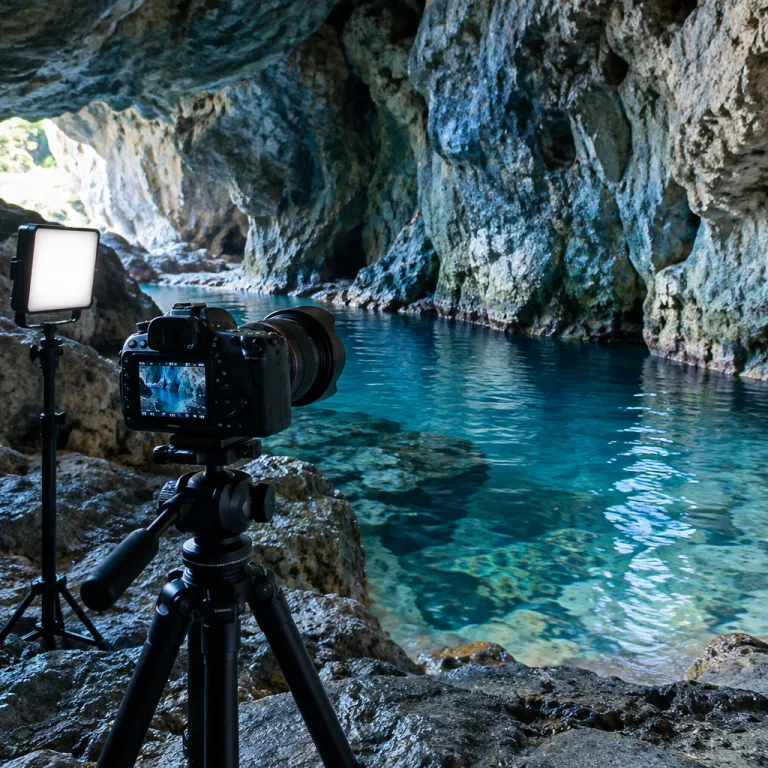
Good cave photography tips on lighting and exposure always start with stable support. A compact but solid tripod is vital in a dark cave, because long shutter speed values are the only way to gather enough light without pushing ISO so high that the image falls apart with noise. In many small caves, a mini tripod or clamp can help compose a steady scene where there is no room for full sized legs.
Choose a camera with strong low light performance and manual controls, because photographing caves requires precise adjustment of exposure, focus, and white balance. Mirrorless cameras with bright electronic viewfinders make it easier to judge how light falls on rock formations and cave walls, while a fast wide angle lens lets you keep a narrow aperture like f/8 or f/11 for generous depth of field. That narrow aperture helps maintain a strong sense of depth from foreground stones to distant cave interior details, even when the only light comes from your own lamps.
Bring at least two independent light sources, such as a powerful headlamp and a handheld LED panel, so you can shape the scene instead of accepting flat tour lighting. Continuous lights are safer than flash in many caves, and they allow you to paint light across a subject cave during a long exposure while watching how shadows move. For more advanced control of light craft in underground spaces, you can study specialised low light workshops such as those described in this guide to light craft workshops in digital photography, then adapt those techniques to the unique constraints of caves.

Balancing shutter speed, aperture, and ISO in a dark cave
Inside a cave, exposure is a constant negotiation between shutter speed, aperture, and ISO. Because caves require long shutter speed values to collect enough light, you should usually start around 5 to 15 seconds and adjust after checking the image histogram. A narrow aperture such as f/8 to f/16 keeps depth of field deep, which preserves a clear sense of depth from the nearest rock formations to the farthest cave walls.
When you combine a narrow aperture with long shutter speed times, ISO can often stay between 400 and 1600, which gives a better balance between noise and detail for most modern camera sensors. If people move through the scene during a tour, you can either embrace their ghostly trails as part of the photo or wait for a quiet moment to capture a clean cave image without motion blur. For handheld shots where a tripod is impossible, raise ISO further and accept some grain, because a sharp noisy image is always better than a blurred one.
White balance deserves special attention underground, since mixed light from tour lamps, headlamps, and LED panels can shift colours unpredictably. Set a manual white balance preset such as tungsten, then refine it later when you process the RAW image, or use a grey card at the start of the session to lock in a reliable reference for the entire cave interior. For more detailed practice with low light exposure decisions, especially when using compact zoom lenses, you can study techniques similar to those used in low light photography with a Canon RF 18–45 mm lens and then translate those lessons to your own cave camera and lens combination.

Lighting strategies that respect caves and reveal texture
Thoughtful lighting turns a flat cave scene into a three dimensional image. Instead of blasting the subject cave with direct light, move your lamp to the side so that it grazes rock formations and carves out shadows that emphasise texture. Side lighting across cave walls creates a stronger sense of depth than front lighting, especially when combined with a narrow aperture and careful focus.
During a long exposure, you can walk through the dark cave with a headlamp and gently paint light across different parts of the cave interior. This technique lets you help compose the final photo by deciding which areas will glow and which will fade into darkness, rather than leaving everything to the fixed tour lighting. Keep the lamp moving to avoid harsh hotspots, and aim it slightly away from the camera to prevent flare that would wash out the cave image.
When people appear in your cave photography, ask them to stand still for a few seconds while you light them separately from the background. A brief burst of light on the people, followed by longer painting on the cave walls, keeps them sharp while still revealing the environment with rich shadows and highlights. Always follow the cave operator’s safety rules and environmental guidelines, because responsible photographing of caves requires protecting fragile formations and respecting any stated privacy policy about where and how images may be shared.

Focusing, composition, and managing depth of field underground
Autofocus often struggles in a dark cave, so you should be ready to switch to manual focus. Use your camera’s magnified live view to focus on a bright edge of the subject cave, such as a lit stalactite or a reflective patch on cave walls. Once focus is locked, keep the same distance for several frames, because recomposing too much can shift the depth of field and soften critical details.
To help compose stronger images, think in layers from foreground to background, which will naturally build a sense of depth in the final photo. Place a bold rock formation or pool of water close to the lens, then use a narrow aperture to keep mid ground and background elements acceptably sharp, so the viewer’s eye travels through the cave interior. Leading lines such as flowstone ridges or a path used by the tour can guide people visually into the frame and make the cave photograph feel immersive rather than flat.
When you work in small caves, composition becomes even more demanding, because every small movement of the camera changes the relationship between subject and background. Try vertical frames to emphasise height, or tilt slightly upward to include both floor textures and ceiling formations without cluttering the scene. If your camera offers focus peaking, enable it to see which parts of the cave photography scene fall within the depth of field, then refine focus until the most important details glow with crisp edges.
Practical workflow, ethics, and using video in caves
A smooth workflow in caves will reduce stress and help you react quickly when the guide moves the group. Before entering the cave, set a base ISO, aperture, and shutter speed, then save them to a custom mode on your camera so you can return to a reliable exposure with one dial turn. Keep your gear layout simple, because fumbling with too many lenses in a dark cave wastes precious tour time and increases the risk of damage.
Many photographers now record both still photography and video during a cave tour, using the same cave camera for both tasks. Continuous video light can help compose still images, while long exposure stills can inform how you plan video sequences that reveal a sense of depth and motion. If you want a compact solution for both high resolution video and stills in challenging light, you can study hybrid devices such as the 5K vlogging camcorders reviewed in this test of a 5K video camera for low light shooting and then decide whether a similar tool fits your own cave work.
Ethical cave photography means respecting both people and environment at every stage of the process. Ask permission before including recognisable people in a photo, explain how the image will be used, and follow any privacy policy set by the cave operator or tour company. Avoid touching delicate rock formations, keep lights pointed away from wildlife, and remember that photographing caves requires you to leave no trace beyond the images you carry out.
Key statistics on low light and cave photography
- Studies of handheld shooting in low light show that most photographers can reliably avoid motion blur at shutter speeds around 1 divided by the focal length in seconds, while cave photography often pushes exposures to several seconds, which makes tripod use almost mandatory for sharp images. For example, tests summarised by the National Press Photographers Association and camera reviewers at DPReview confirm that many shooters can handhold a 50 mm lens at roughly 1/60 s with acceptable sharpness, but not at multi second exposures. These findings are consistent with widely cited “reciprocal rule” discussions in press photography training materials.
- Sensor tests from independent laboratories indicate that modern full frame cameras can maintain acceptable noise levels up to ISO 3200 or 6400, which gives photographers more flexibility to balance shutter speed and aperture when photographing caves without excessive grain. Public lab data from sources such as DxOMark and manufacturer white papers on cameras like the Nikon Z6 II, Canon EOS R6, and Sony A7 III show that signal to noise ratios remain usable for large prints at these ISO values, and these figures are frequently referenced in camera review summaries.
- Tourism reports from major show caves such as Postojna Cave and Carlsbad Caverns indicate that guided tours typically last between 60 and 90 minutes, which limits the time available for careful composition and encourages photographers to plan settings and shot lists in advance. Visitor information published by these cave operators notes that groups move at a steady pace, so photographers must work quickly at each stop, a point echoed in many travel photography guides that cover underground attractions.
- Environmental guidelines from speleological societies emphasise that even brief contact with delicate formations can cause permanent damage, which is why many caves require visitors to stay on marked paths and restrict the use of powerful flash units or drones. Codes of conduct from organisations such as the National Speleological Society and regional caving clubs stress “take nothing but pictures, leave nothing but footprints” as a core principle, and these recommendations are repeated in conservation briefings for guided cave tours.
FAQ about cave photography tips, lighting, and exposure
What camera settings work best for cave photography
A reliable starting point for cave photography is manual mode with a shutter speed between 5 and 15 seconds, an aperture around f/8 to f/11, and ISO between 400 and 1600. These settings provide enough light for a clean image while preserving depth of field and limiting noise. Always check the histogram after each test photo and adjust exposure to avoid clipping highlights on bright rock formations.
How should I light a dark cave without ruining the atmosphere
Use continuous LED lights or headlamps held to the side of the subject cave, rather than pointing them straight from the camera position. Side lighting creates gentle shadows that reveal texture on cave walls and rock formations while maintaining a natural mood. During long exposures, move the light slowly to paint the scene and avoid harsh hotspots.
How do I set white balance when photographing caves
Because caves often mix tungsten tour lights, LED lamps, and sometimes daylight near entrances, automatic white balance can be unreliable. Set a manual white balance preset such as tungsten or custom, or photograph a grey card at the start of the session to create a reference for later editing. Shooting RAW gives you the flexibility to fine tune white balance after the tour without degrading the image.
What is the best way to focus in very low light underground
Switch to manual focus and use live view magnification to focus on a bright edge or high contrast detail in the cave interior. If your camera offers focus peaking, enable it to see which areas fall within the depth of field at your chosen aperture. Once focus is set, avoid changing distance too often and capture several frames with the same focus point to ensure at least one perfectly sharp image.
Are there ethical rules I should follow when photographing caves
Yes, ethical cave photography means protecting the environment and respecting people on the tour. Stay on marked paths, avoid touching formations, use only the amount of light necessary, and follow any restrictions on flash or tripods. Always respect the cave operator’s privacy policy and obtain consent before sharing images that clearly show other visitors.