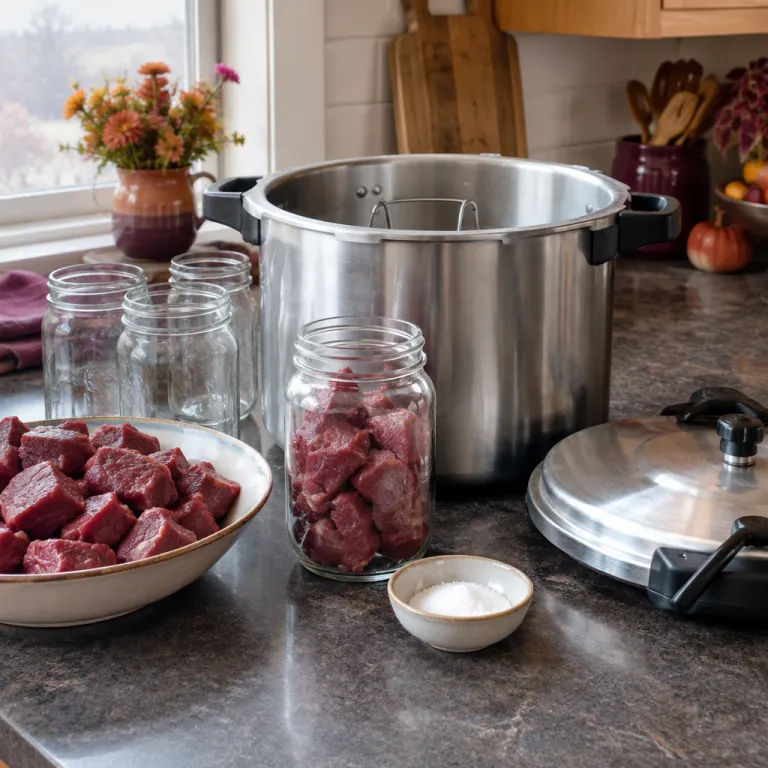
Understanding the Basics of Canning with a Pressure Cooker
Essential Concepts Behind Pressure Canning
Canning with a pressure cooker is an effective method for preserving meat, including venison, by using high heat to eliminate bacteria and create a vacuum seal. This canning method is not only safe but enhances the shelf life and maintains the nutritional value of the food. Understanding the process is crucial for anyone looking to master the art of canning deer meat.Why Use a Pressure Canner?
When it comes to canning meat, it is essential to use a specialized tool known as a pressure canner. This device is different from a standard pressure cooker and is designed specifically for the higher pressure needed to safely preserve low-acid foods, such as meats and vegetables. The pressure canner operates by increasing the temperature to at least 240°F, a crucial factor for safely killing harmful bacteria that could be present in meat.Key Steps in the Canning Process
- Fill Quart Jars: Start by preparing quart jars with raw pack deer meat. Add appropriate seasonings such as salt and any desired spices.
- Add Liquid: It is important to fill the jars with non-chlorinated water up to the recommended headspace. This ensures proper sealing and cooking.
- Seal the Jars: Place lids on the jars, ensuring they are tightly secured to maintain the vacuum seal during canning.
Time and Temperature
The process demands precise timing and temperature settings. Typically, canned meat requires processing for about 75 to 90 minutes depending on the size of the jar and elevation. Monitoring the time and pressure is essential for achieving the desired safe results. As you advance through the various stages of canning venison, you'll notice how equipment choice and preparation methods contribute significantly to the success of your canned product. Ensure to familiarize yourself with specific safety tips and common errors to avoid during your canning endeavors to guarantee both safety and quality in your final product. Refer to additional tips on storing and using canned deer meat to keep your canned venison fresh and ready for future use.Preparing Deer Meat for Canning
Getting Your Venison Ready for the Canning Process
Preparing deer meat for canning is a crucial step in ensuring the quality and safety of your canned venison. The process begins with selecting the right cuts of meat. Ideally, you want to use fresh, high-quality venison, as this will impact the taste and texture of your final product.
Start by trimming off any excess fat and sinew from the deer meat. Fat can affect the sealing process and may lead to spoilage, so it’s important to be thorough. Once trimmed, cut the meat into uniform pieces. This will help ensure even cooking and make it easier to pack the jars.
Seasoning and Packing the Jars
Before you begin packing the jars, consider whether you want to season your meat. A simple recipe involves adding a teaspoon of salt per quart jar, but you can also experiment with other spices to enhance the flavor of your canned meat. Remember, the seasoning should complement the natural taste of venison without overpowering it.
When packing the jars, use the raw pack method. This involves placing the raw meat directly into the jars without pre-cooking. Fill the jars with the meat, leaving about an inch of headspace at the top. This space is necessary to allow for expansion during the pressure canning process.
Adding Liquid and Sealing the Jars
Once your jars are filled with meat, you’ll need to add liquid. Boiling water is commonly used, but you can also use broth for added flavor. Pour the liquid over the meat, ensuring it covers the contents while still maintaining the headspace. This step is crucial for creating the right environment for pressure canning.
After adding the liquid, wipe the rims of the jars to remove any residue that could prevent a proper seal. Place the lids on the jars and secure them with the rings, but avoid overtightening. The lids need to be able to vent during the canning process.
With your jars prepared, you’re now ready to move on to the pressure canning stage, where the magic of preserving your venison truly happens. For more detailed guidance on canning meat, you might find this comprehensive guide helpful.
Choosing the Right Pressure Cooker for Canning
Selecting a Suitable Appliance for Your Canning Venture
Choosing the right pressure cooker is crucial in ensuring your canned venison turns out safe and flavorful. While there are various options available, not every pressure cooker is suitable for canning meat, including deer meat. To achieve the best results, here's what you need to consider:- Pressure Requirements: Ensure your chosen pressure cooker is capable of maintaining a constant pressure, usually measured in pounds per square inch (PSI). For canning meat, a pressure rating of around 10-15 PSI is typically required.
- Capacity: Depending on the volume of deer meat you intend to can, you'll need a pressure canner with sufficient capacity. Quart jars are commonly used, so a pressure canner that can accommodate multiple quart-sized jars is ideal.
- Compatibility with Jars: Not all pressure cookers are designed to work with standard canning jars. Make sure that your appliance supports jars suitable for canning. The jars need to fit comfortably with enough space left for water circulation.
- Durability and Materials: Investing in a high-quality, durable pressure canner can save you time and trouble in the long run. Stainless steel is a preferred material for its longevity and ability to withstand high pressures.
- Safety Features: Safety is paramount when dealing with high-pressure steam. Look for features such as locking lids and pressure release valves that ensure safe canning practices.
Step-by-Step Guide to Canning Deer Meat
Getting Started with Pressure Canning
To begin canning deer meat, ensure you have all the necessary equipment ready. This includes your pressure canner, quart jars, lids, and rings. It's crucial to have your jars and lids sterilized before starting the process. Cleanliness is key to preventing contamination and ensuring the safety of your canned venison.
Filling the Jars with Prepared Meat
Once your deer meat is prepared, it's time to fill the jars. Use the raw pack method by placing the meat directly into the jars without pre-cooking. Add a teaspoon of salt per quart jar for flavor, though this is optional. Fill the jars with meat, leaving about an inch of headspace at the top. This space is important for the pressure canning process.
Setting Up the Pressure Canner
Place the filled jars into the pressure canner. Add the recommended amount of water as per your canner's instructions. Secure the lid of the pressure canner and ensure the vent pipe is open. Turn on the heat and allow the canner to vent steam for about 10 minutes before closing the vent.
Processing Time and Pressure
Once the vent is closed, the pressure will begin to build. For canning deer meat, maintain a pressure of 10 pounds. Process the jars for 75 minutes if using pint jars or 90 minutes for quart jars. This time ensures the meat is safely preserved.
Cooling and Storing Canned Meat
After the processing time, turn off the heat and allow the canner to cool naturally. Do not attempt to open the canner until the pressure has completely dropped. Once cooled, carefully remove the jars and let them sit undisturbed for 12 to 24 hours. Check the seals before storing your canned meat in a cool, dark place.
Safety Tips and Common Mistakes to Avoid
Prioritize Safety for Optimal Results
When you're dealing with pressure canners, safety is of paramount importance. Ensuring the safe preservation of your deer meat with a pressure cooker involves several considerations that can't be overlooked.- Monitor the Pressure: Keep a constant eye on the pressure gauge. It's crucial to maintain the correct pressure for the entire processing time to ensure your canned meat is safe to consume.
- Jars and Lids: Always inspect your quart jars and lids before filling them with venison. Look for any chips or cracks on jars and ensure that lids are not damaged. These can compromise the seal and lead to spoilage.
- Using a Pressure Canner: Understand your pressure canner’s operating manual thoroughly. Whether you’re using an instant pot as your canner or a traditional pressure canner, you should be aware of its specific guidelines and instructions.
- Timing is Key: Different recipes and weights of the meat will require variable time settings. Follow the recipe's instructions closely, especially paying attention to how many minutes are needed.
Avoid These Common Mistakes
Mistakes during the canning process can lead to unsafe canned venison or poor taste results. Below are typical errors to avoid:- Improper Venting: Venting is crucial before pressurizing begins. Ensure all air is expelled from the pressure canner by venting steam for about 10 minutes.
- Not Using the Right Salt: Always use canning salt as additives in other salts can affect the end product. Add the appropriate amount to each jar according to your recipe.
- Filling Jars Incorrectly: Fill jars with venison up to the recommended level, leaving the right amount of headspace. Too much or too little can affect the seal development.
- Ignoring Altitude Adjustments: Adjust your process according to your location’s altitude. The pressure required varies and increases with elevation, which can impact the safety and preservation of canned meat.